Onboarding
A quick guide to the first-time setup experience for new monoAdmin projects.
When you first create a monoAdmin project or join a new one, you’ll be guided through a brief onboarding process to ensure your server is ready for management.
Welcome to Your Project
Section titled “Welcome to Your Project”The onboarding flow is designed to take about 2 minutes and helps you set up the essential foundations of your staff environment.
The 4-Step Setup
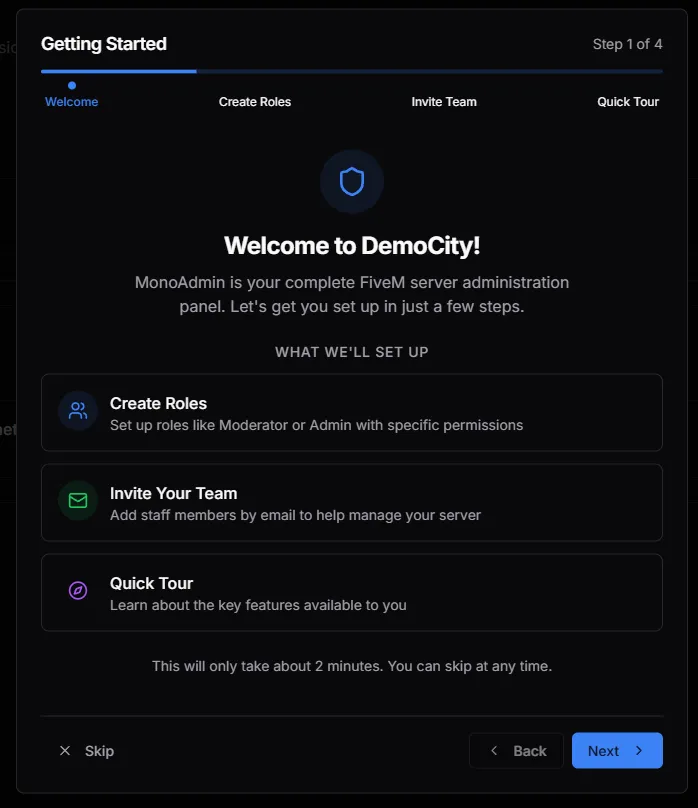
Section titled “The 4-Step Setup”1. Welcome
Section titled “1. Welcome”A brief introduction to the panel. This step confirms the name of your server (e.g., “DemoCity”) and prepares the environment for your staff.
2. Create Roles
Section titled “2. Create Roles”Before you invite staff, you need to define their permissions. This step encourages you to create your initial Staff Roles (like Moderator or Admin) so that invited members have the correct access from the moment they join.
3. Invite Your Team
Section titled “3. Invite Your Team”Once your roles are defined, you can start adding staff members. By entering their email addresses, you can send secure invitations directly from the onboarding UI.
4. Quick Tour
Section titled “4. Quick Tour”The final step provides a rapid overview of the key features of the monoAdmin Web Panel, ensuring you know exactly where to find the Live Map, Player Monitor, and Reports.
Skipping & Resuming
Section titled “Skipping & Resuming”If you’re in a hurry, you can click Skip at any time to enter the full dashboard. You can always finish these tasks later by visiting the respective Roles and Members pages.